The Gmail AI attachment document classifier
- Published on
- Authors

- Name
- Zwanga Mukwevho
- @Z_Mukwevho
Table of Contents
Earlier this month (November 2023) a friend of mine mentioned they struggled organising their work, by this I mean they have 3 different note taking apps, they do not have a central place where they keep they're documents and so on. The latter really struck a nerve, a friend of mine as well had specifically mentioned they'd also want to have a system that would automatically save and classify all the documents they send via email for better management.
Which is why I build this mini-application to read my Gmail, if there's an attachment on a specific email automatically upload the attachment to my Google Drive to a specific subdirectory. Which directory the attachment is uploaded is determined by what the email subject and the name of the attachment.
An example of this would be an email with subjectz Booking Receipt Email #12NIG5 and attachment name Booking Receipt Email #12NIG5 will be uploaded to the finance subdirectory and not health subdirectory.
Project and OpenAI Setup
The code for this is available on my personal github on doc-classifier. Clone the code to your machine. (I am running my code on an EC2 instance)
git clone https://github.com/ZwangaMukwevho/doc-classification
Go installation is required for this project. Setup can be found on. Golang Installation. (Maybe an extension of this is getting it to run on a Docker Container)
You will also be required to setup an OpenAI acount. In order to set it up, create an account with openai. and navigate to the api-keys to create the api key. Create a
.envfile and paste your api key in.envfile.
touch .env
- inside the .env the key should look like (Where
xxxxxxxxxxxxxxxxxxxxxxxxxxxxxxxxxxis yourapi-key):
OPENAI_API_KEY=xxxxxxxxxxxxxxxxxxxxxxxxxxxxxxxxxx
Google Setup
- Since this project using Google API's and Service which uses
OAuth 2.0for authentication. The steps below will outline setting this up.
- Set up an account with the Google Cloud Platform from here
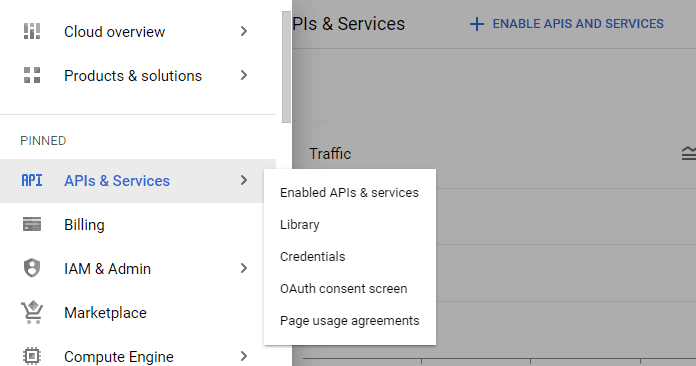
- Once in the home page, open the lunchbar menu on your top left, Navigate to
APIs & ServicesthenEnabled APIs & Services.
- This will prompt you to choose a project. If you don't have one create one or use an existing one.
- Go to the
Credentialstab (Can be seen on image on step 2), then click the+ CREATE CREDENTIALStab then chooseOAuth Client ID. - When prompted for application type choose
Desktop Appand Give it a name. - Click
Createthen download OAuth2.0 credentials file to the root folder of your project. - Create another
.envfile inside thesetupfolder and add content below. Where GOOGLE_AUTH_FILE is the name of the OAuth2.0 Credentials file from above. (i.e replacegoogle_api_services.pngwith the name of your file)
GOOGLE_AUTH_FILE=name_of_oath2.0_file
GMAIL_TOKEN_FILE=token_gmail.json
G_DRIVE_TOKEN_FILE=token_g_drive.json
- The next step is to setup the Gdrive directories in which the documents will be uploaded in when they are classified. Login to your Googledrive and make new directories. I personally have 8 directories which are:
1. Education 5. Home
2. Entertainment 6. Personal
3. Finance 7. Work
4. Health 8. Default
- Once that is done, Navigate to the
Setupdirectory and run thesetup.go.
cd setup
go run setup.go
- You will be promted to setup you Gmail and Gdrive credentials on CLI. Click on the link that is outputed on the CLI.
- Choose the specific google profile you want to use for your GMAIL and follow the instructions.
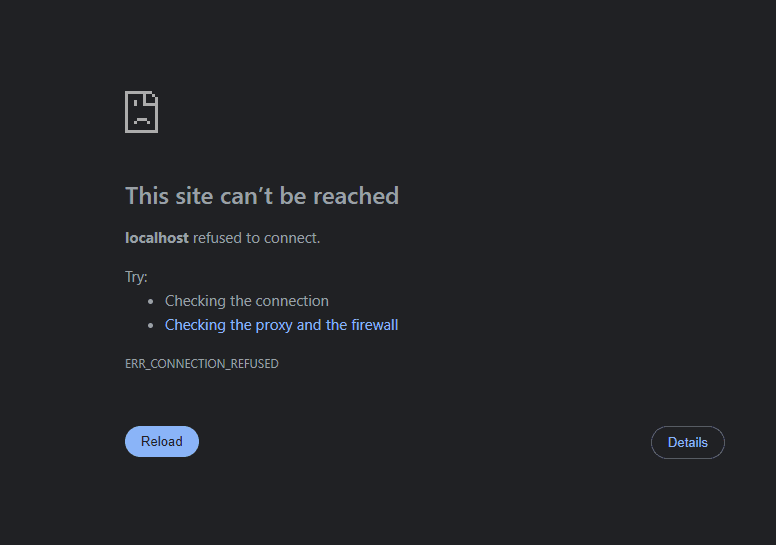
- You will get to a localhost connection error as below after finishing with the setup:
- Copy the URL from your browser and it will look like the snippet below. As you can see the
scopepath parameter is4444444xxxx(Look for thecode=4444444xxxx, but yours will be different). Copy that, paste it on your command line and press enter.
http://localhost/?state=state-token&code=4444444xxxxx&scope=https://www.googleapis.com/auth/gmail.readonly
- You will repeat the step 11-14 again for setting up google drive. (There will be a prompt on the command line for setting up google drive).
- Once this is done it will create the
pkg/common/directories.json,token_gmail.jsonandtoken_g_drive.jsonfiles.
Running the code
- Once this is done, Navigate to the root folder and run the
main.go
go mod tidy
go run main.go
- The code is setup to run a cron every midnight